1. Background Keepalive Status
Background keepalive mainly depends on setting Battery Optimization to unrestricted and locking the app in the recent tasks card.
Tip
Starting from version 1.4.0, background keepalive has been significantly improved. If you are on an older version, please try upgrading first.
If the app still cannot stay alive in the background, see here.
About Auto-start and Boot Launch
This feature is not directly implemented yet, but you can enable Clipboard Source History or Notification History so the system can bring up the app after boot. On non-Root devices, you still need to manually grant Shizuku permission after startup before clipboard listening can work.
2. Wireless Debugging
On some systems such as HarmonyOS 3, the developer options may not include a Wireless debugging toggle. You may need to use a computer to enable wireless debugging, or activate Shizuku directly with a wired computer connection.
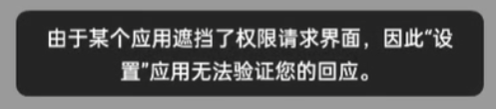
If the following message appears when enabling wireless debugging on HarmonyOS, you need to turn off the system floating ball.
3. Minimized Startup Fails at Boot
When updating the program with the installer, do not check Auto Start during installation. Use the in-app Launch at Startup setting instead. Fresh installs are fine.
If you already checked it by mistake, try turning the in-app Launch at Startup setting off and back on, or press Win + R, run shell:startup, check whether the startup folder contains ClipShare, and delete it.
Why
If Auto Start is checked in the installer, a shortcut is added to the startup folder so the program starts after boot. The app itself also has its own launch-at-startup setting, which causes the app to start twice. The second launch brings the program window to the foreground, so it looks like minimized startup failed.
4. Android Phones of the Same Model Cannot Connect
This is basically caused by duplicate device id values, not duplicate device names. Solution: uninstall and reinstall version 1.3.0 or above.
Why
Before version 1.3.0, Android used the system android id as the source for generating the device id. In theory this id should not be duplicated. However, in practice, devices of the same model could still end up with duplicate ids, possibly due to manufacturer behavior. Starting from version 1.3.0, the device id generation method was changed. To stay compatible with old device-id data, the new id generation method only takes effect after a fresh install or after clearing the app data.
If you do not want to reinstall, you can first upgrade to version 1.3.0 or above, then go to About -> Database Version, click the icon on the right to enter the database editor page, execute the following SQL to switch to the new id generation method, and restart the app. There will be no prompt if it succeeds.
update Config
set value = 'persistentDeviceId'
where key = 'mobileDevIdGenerateWay'
Note
Changing the id generation method by editing the database is equivalent to becoming a new device, so re-pairing is required.
5. FeiniuOS WebDAV Sync Failure
If you use Feiniu's WebDAV feature as the relay method, sync may currently fail because it seems not to support directly creating nested folders.
Solution: use a scheduled task to automatically create the required folders every day.
Steps:
5.1 Install 1Panel from the Feiniu Store
Remember the account, password, and secure entry during installation, then open 1Panel and make sure you access it through the secure entry.

5.2 Create a Scheduled Script
Add a scheduled task and set the time as you like. 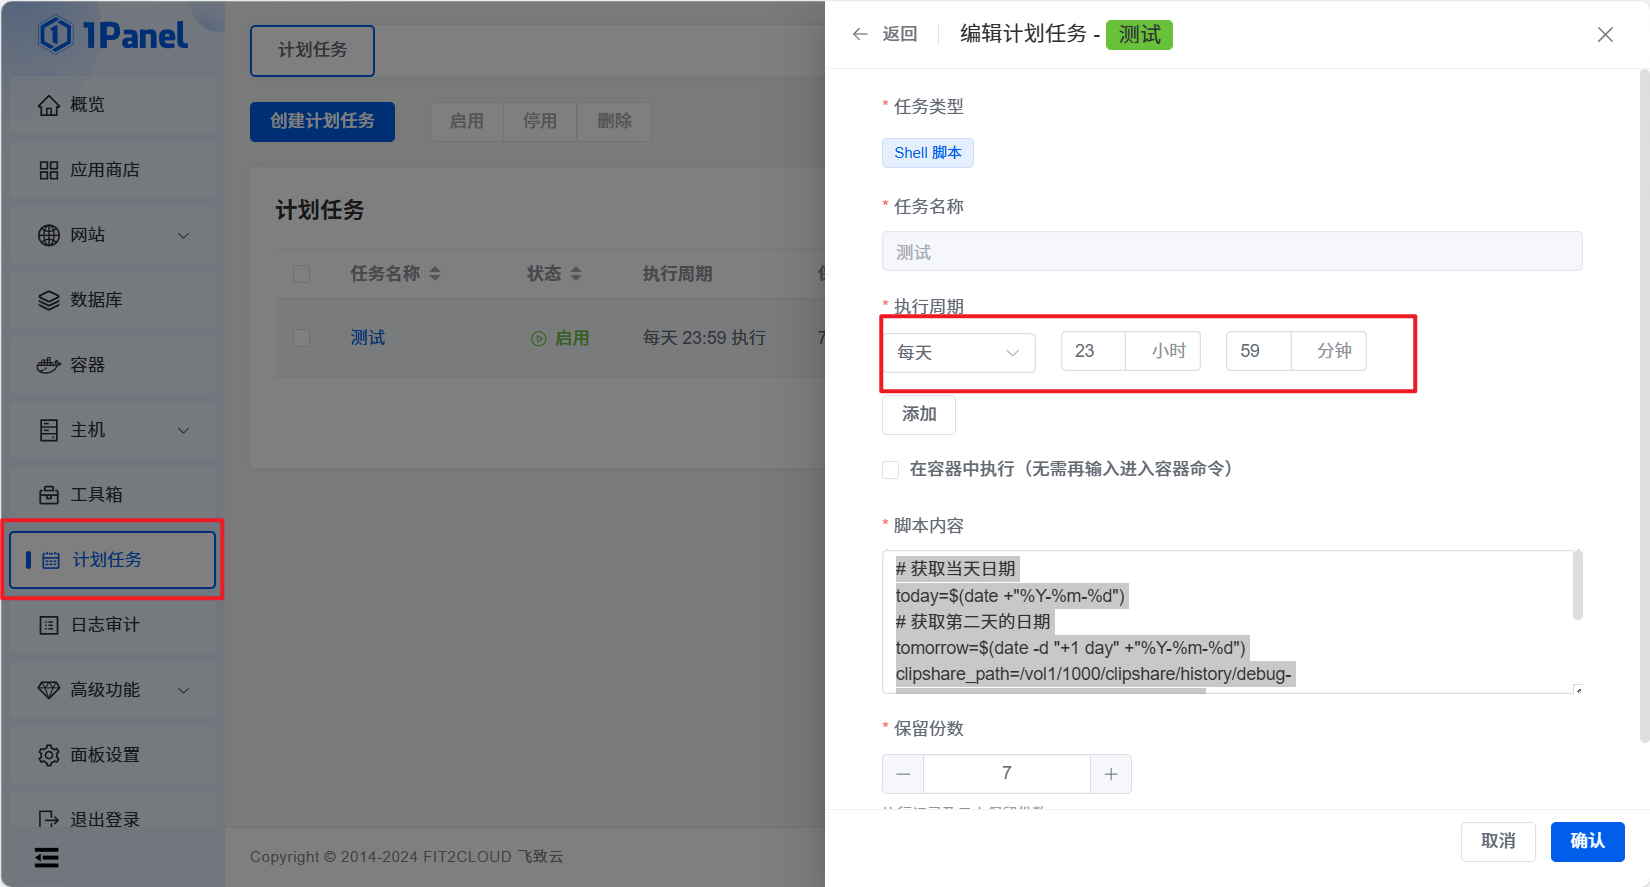
Fill in the script below:
Tip
This script creates folders for today and tomorrow. Replace the folder path in the script with the folder for the corresponding device id under the ClipShare history directory.
# Get today's date
today=$(date +"%Y-%m-%d")
# Get tomorrow's date
tomorrow=$(date -d "+1 day" +"%Y-%m-%d")

# ↓↓ In the Feiniu file path bar, find the folder path for the device id under ClipShare's `history` folder and replace it directly ↓↓
clipshare_path=/vol1/1000/clipshare/history/d270e51d53eec265276646acf646448d

# Create today's folder
mkdir -p $clipshare_path/$today/files
# Create tomorrow's folder
mkdir -p $clipshare_path/$tomorrow/files
6. No Automatic Copy After Android Sync
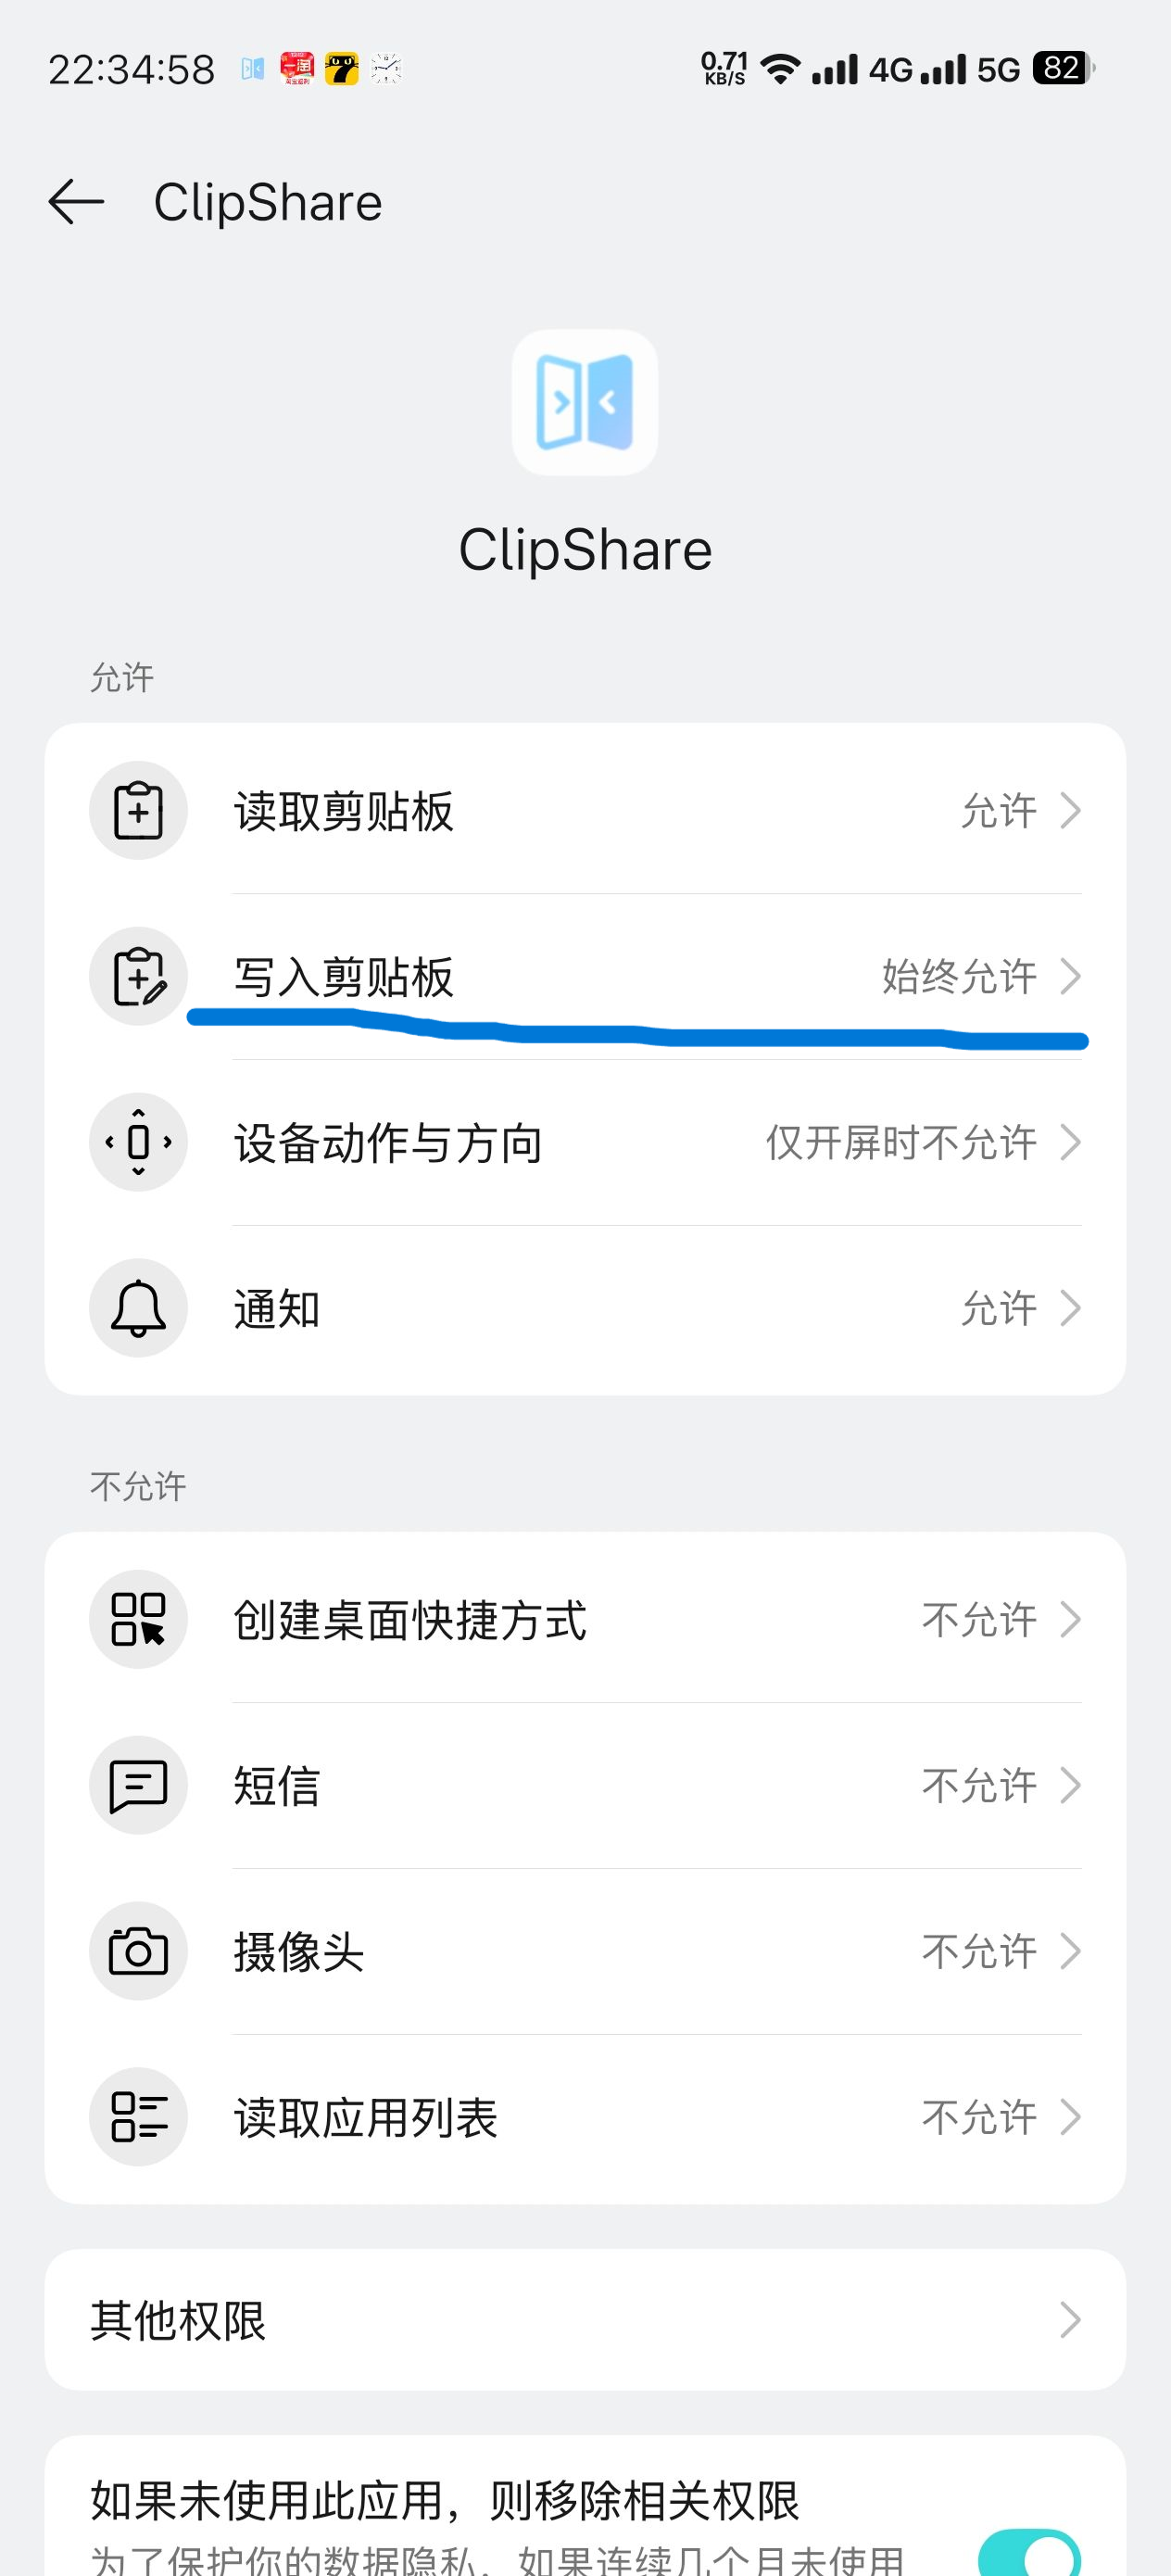
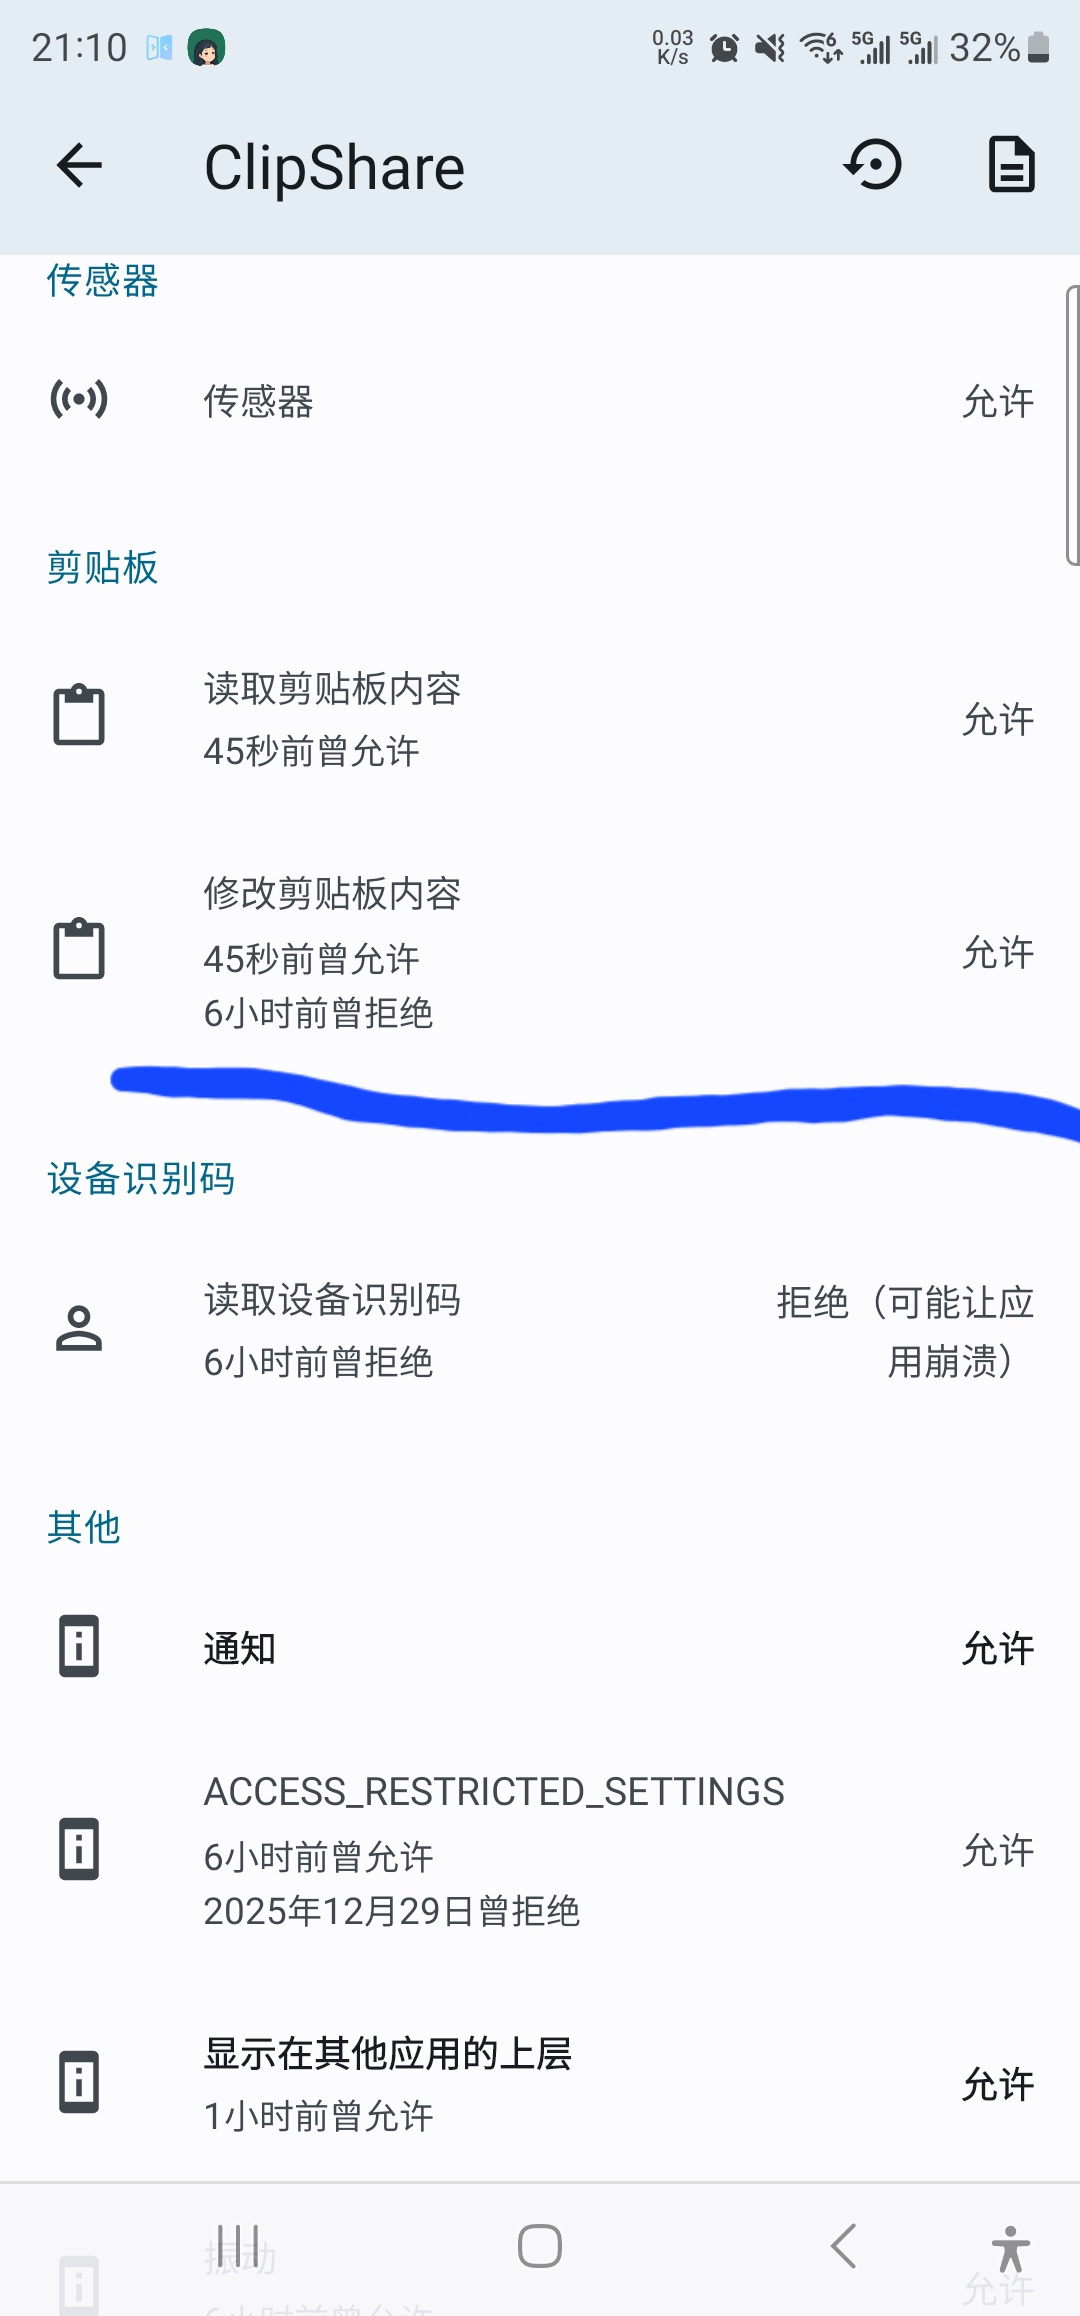
Usually this happens because clipboard write permission was not granted, or because some systems grant it only while in use by default. Please check the permission settings and grant it manually. If the system has no such setting, install App Ops and grant the permission there.
System settings
App Ops
7. Data Migration After Changing Device ID
After changing the device ID, the records created by the current device may show the device as Unknown, and the devices may need to be paired again, which can trigger a large amount of sync data. You need to manually update the device id in the corresponding database records.
On each device, go to About -> Database Version, click the icon on the right to enter the database editor page, and run the following SQL:
-- Run on the current device: find device ids in History that are not in the Device table (the old device id)
select distinct devId from History
where devId not in (select guid from Device);-- Run on all devices: update the device id in history records
update History set devId = 'new device id' where devId = 'old device id';-- Run on all devices: update the device id in operation records
update OperationRecord set devId = 'new device id' where devId = 'old device id';-- Run on all devices: update the device id in sync records
update OperationSync set devId = 'new device id' where devId = 'old device id';-- Run on all devices: update the device id in source info (takes effect after restarting the app)
update AppInfo set devId = 'new device id' where devId = 'old device id';-- Run on non-current devices: update the device id in the Device table (takes effect after restarting the app)
update Device set guid = 'new device id' where guid = 'old device id';8. Delete Excessively Large Data
On Android, query exceptions may occur when the data size is too large. Possible symptoms include: inability to query history records, crashes when dragging the floating window, etc.
You can execute the following SQL to delete the largest data entry (text) in an attempt to fix the issue. Each execution will delete one entry:
About -> Database Version, click the icon on the right to enter the database editing page, then execute the following SQL:
DELETE FROM History
WHERE id = (
    SELECT id
    FROM History
    WHERE type = 'Text'
    ORDER BY size DESC
    LIMIT 1
);