Relay Mode Usage Guide
By default, the app only supports data sync within a local network. To use it over the public internet, you need either the relay program for forwarding or WebDAV/S3 object storage as the relay method. S3 object storage is generally more recommended.
When using storage as the relay method, changes cannot be detected automatically, so it is usually used together with a notification service.
Note
The current storage-based relay method is still experimental, and its stability may be lower than the relay program.
This relay program is developed in Go and comes with a Web admin panel. It supports both key mode and public mode. In public mode, file sync speed limits can be applied. In key mode, device count and sync speed can be limited.
Source code: Github
Tip
The relay program does not retain any transmitted data. It only forwards traffic.
After a successful bidirectional connection is established, all data except file sync is transmitted in encrypted form.
1. Deployment
1.1 Binary Deployment
1.1.1 Relay Program Download
Tip
Starting from version 1.1.1, the web application has been embedded into the relay program, so the web page no longer needs to be deployed separately.
| Platform | Architecture | Version | Download |
|---|---|---|---|
| Windows | amd64 | 1.1.1 | forward_server_windows_amd64_1.1.1.exe |
| Linux | amd64 | 1.1.1 | forward_server_linux_amd64_1.1.1 |
| Linux | arm64 | 1.1.1 | forward_server_linux_arm64_1.1.1 |
| Historical Versions | - | - | Github |
1.2 Docker Deployment
About container mappings
Tip
Starting from version 1.1.1, the path inside the relay container changed from /data to /app/data.
| Description | Container Path | Container Port |
|---|---|---|
| Relay Program | /app/data | 9283 |
| Admin Web Page | - | 80 |
1.2.1 docker run
docker run -d \
--name clipshare-forward-server \
--restart always \
-p 8180:80 \
-p 9283:9283 \
-e TZ=Asia/Shanghai \
coclyun/clipshare-forward-server:latest
1.2.2 docker-compose
version: "3"
services:
  clipshare-forward-server:
    image: coclyun/clipshare-forward-server:latest
    container_name: clipshare-forward-server
    restart: always
    ports:
      - "8180:80"
      - "9283:9283"
    environment:
      - TZ=Asia/Shanghai
    volumes:
      - ./data:/app/data
2. Web Admin Panel
This project uses a separated frontend and backend architecture. The web page originally needed to be deployed separately: Github.
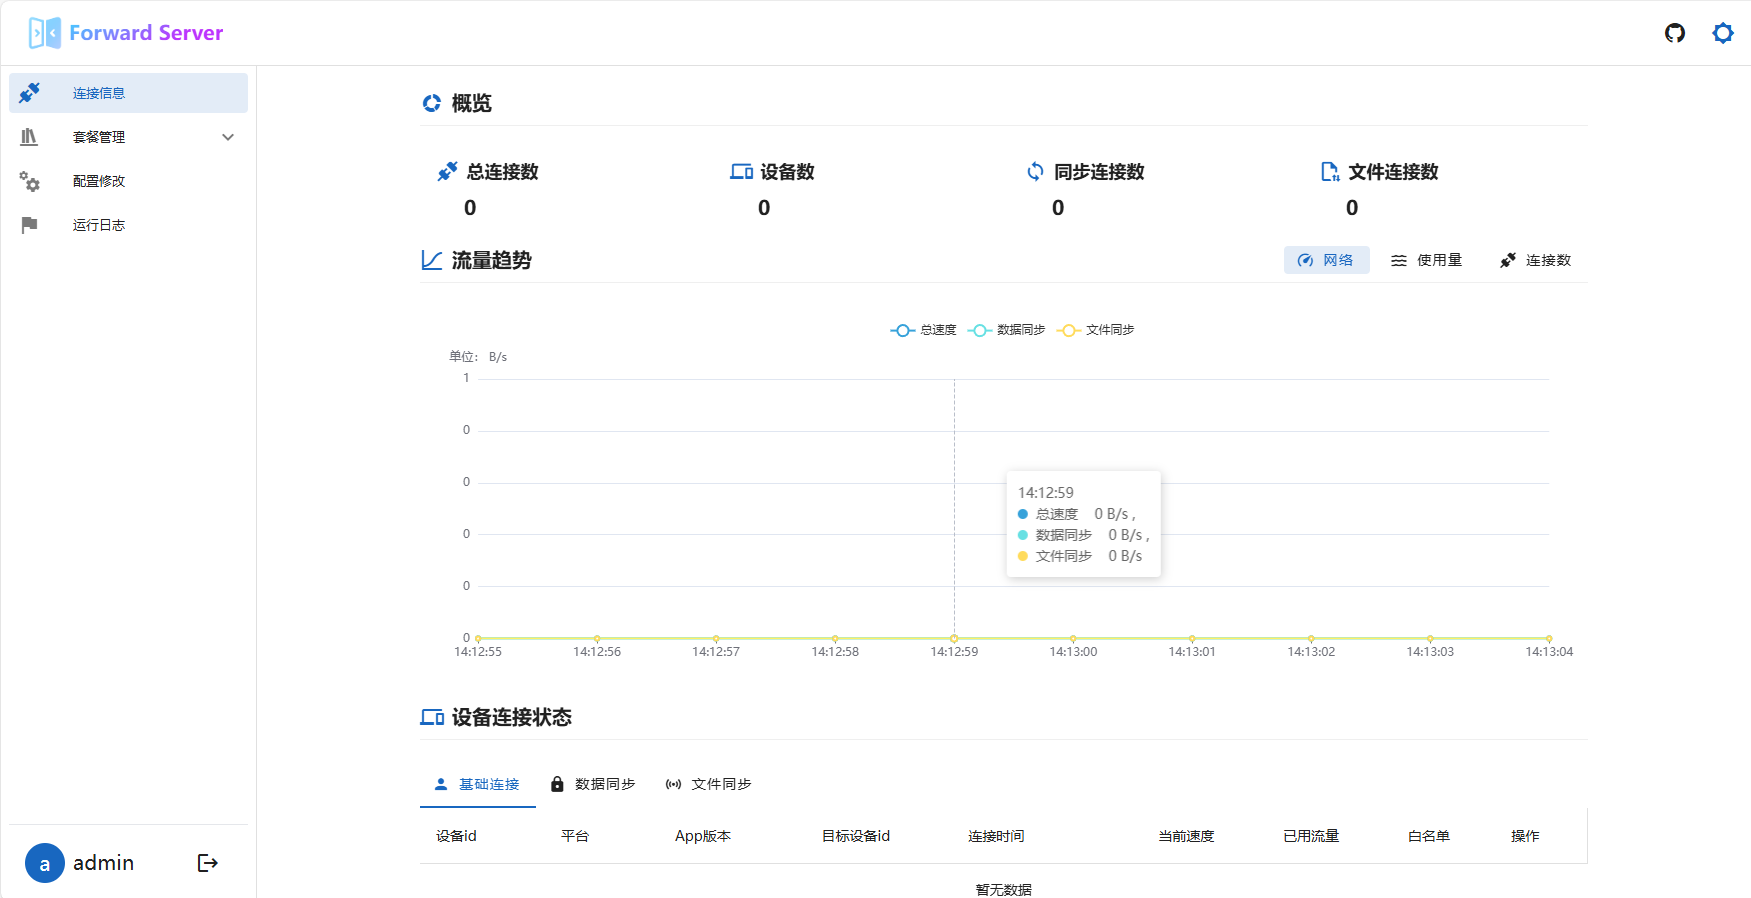
The admin panel mainly provides the following features:
- Simple real-time monitoring of network speed, traffic, and connection count
- Editing for the
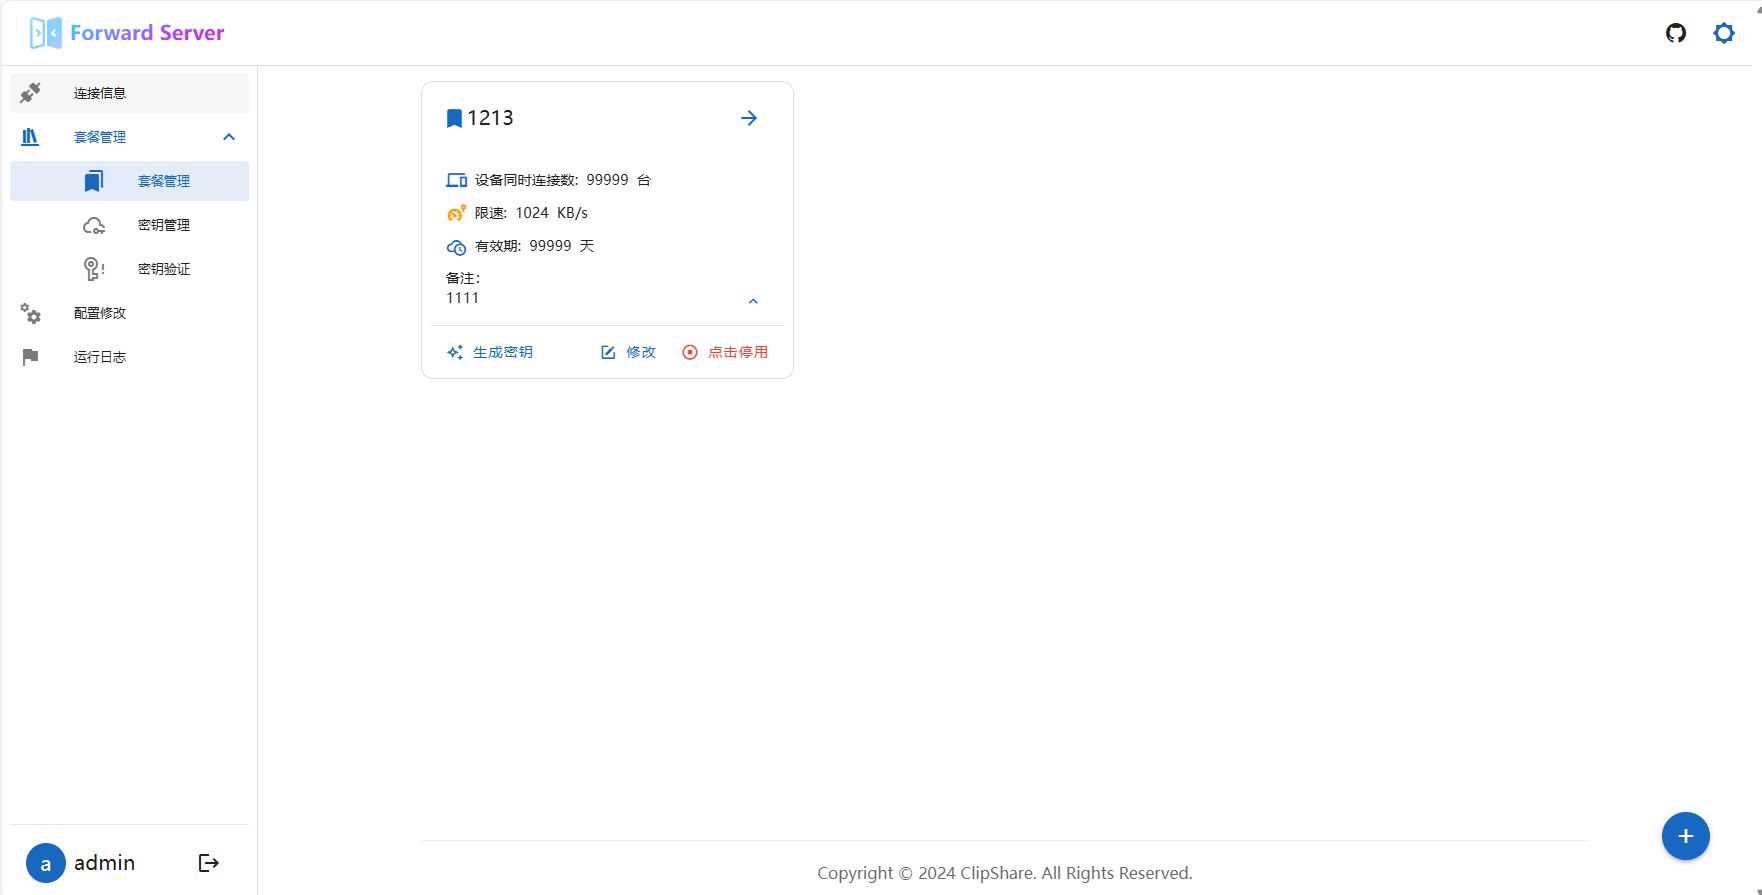
config.yamlconfiguration file - Management of
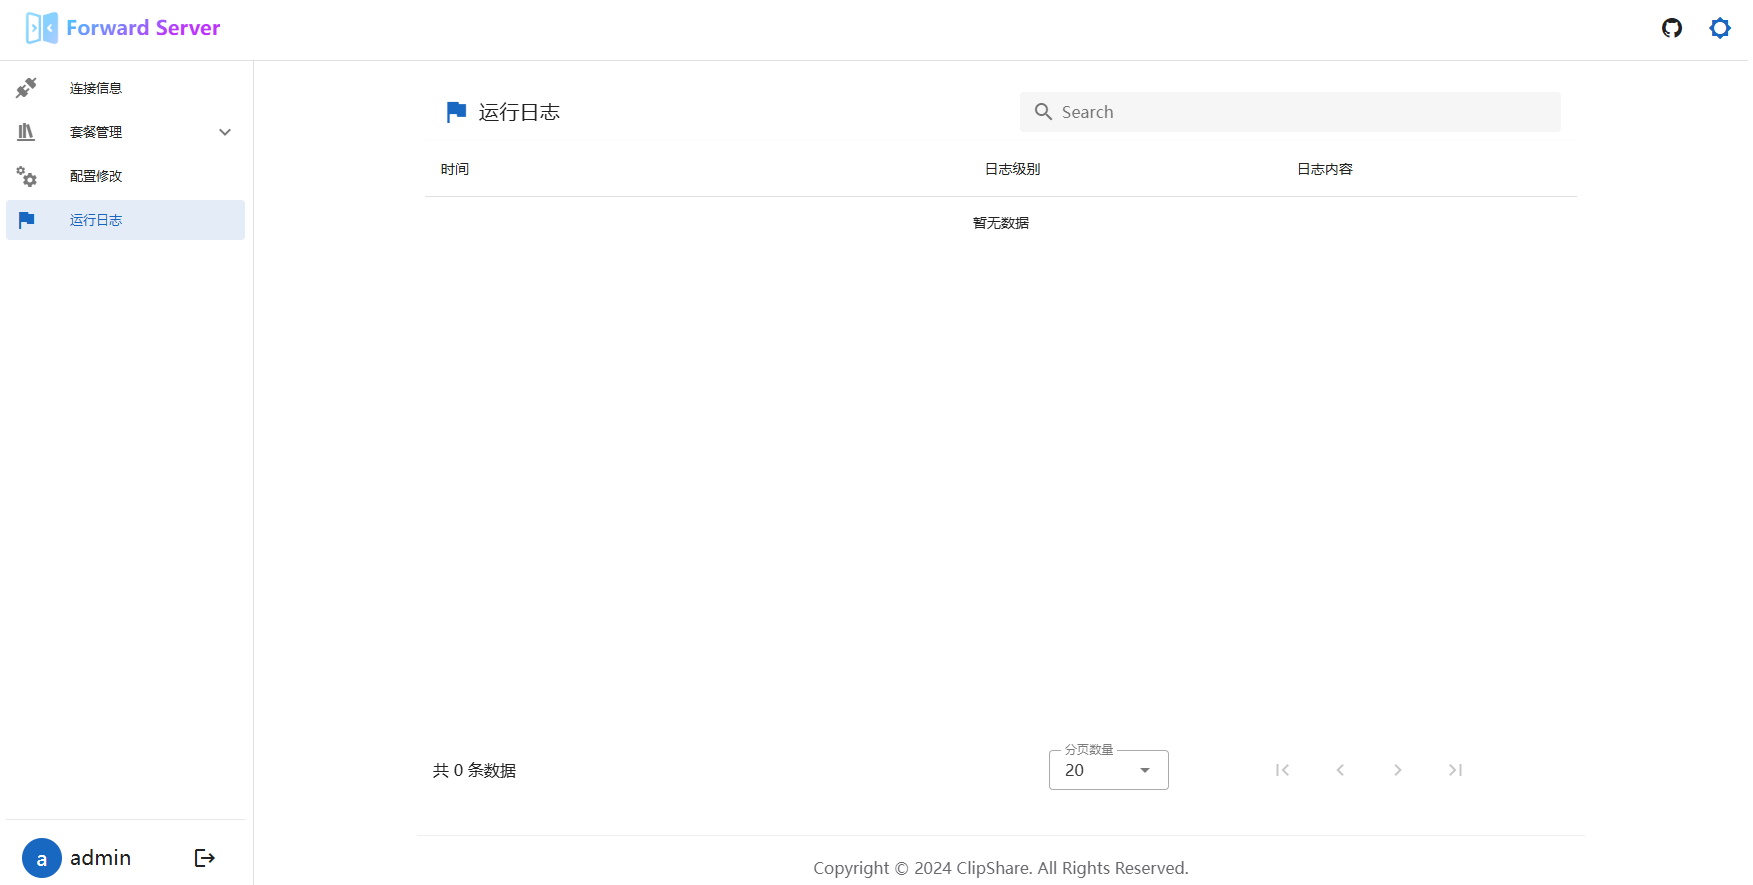
plansandkeysin private mode - Viewing runtime logs


3. File Overview
All relay program files are located in the ./data folder next to the program, including configuration files, database files, log files, and so on.
3.1 Configuration File config.yaml
The configuration file stores the basic settings of the relay program.
Note
Settings marked with * in the comments take effect immediately after modification.
# *Whether public mode is enabled. In public mode anyone can connect. Also, switching from public mode to private mode will disconnect all connections except whitelisted ones.
public-mode: true

# Admin API settings for the web panel
web:
  # Admin API port
  port: 80
  # *Admin login validity period in seconds. If no action is taken, login expires after this duration.
  login-expired-seconds: 1800
  # Administrator account
  admin:
    # *Admin username. Recommended to change it. This is only the default value.
    username: admin
    # *Admin password. Recommended to change it. This is only the default value.
    password: "1234567"

# Relay program settings
forward:
  # Relay program port
  port: 9283
  # *Whitelisted devices. Devices in this list are not subject to any resource limits. This item can be removed if not needed. Both id and name are required. For multiple items, start each with "-".
  unlimited-devices:
    - id: aaa # Device id, which is the device id shown under "Settings" in the app. Required.
      name: aaa # Device name. Required. This can be customized and is unrelated to the app's displayed device name.
      desc: aaa # Description. Optional.
    - id: bbb
      name: bbb
      desc: bbb
  # File transfer limits, effective only in public mode
  file-transfer-limit:
    # *Whether to enable file transfer limits
    enabled: true
    # *Rate limit in KB/s
    rate: 100

# Log settings
log:
  # *Number of logs kept in memory. Other logs can be found under ./data/logs/
  memory-buffer-size: 1000
3.2 Database File
The database file is located at ./data/app.db. It is a sqlite3 database file and is only used in private mode to store configured plans and their associated key information.
4. Setup Tutorials
4.1 Feiniu NAS
4.1.1 Add an Accelerated Mirror
Tip
If your network environment can pull Docker images directly, you can skip this step.
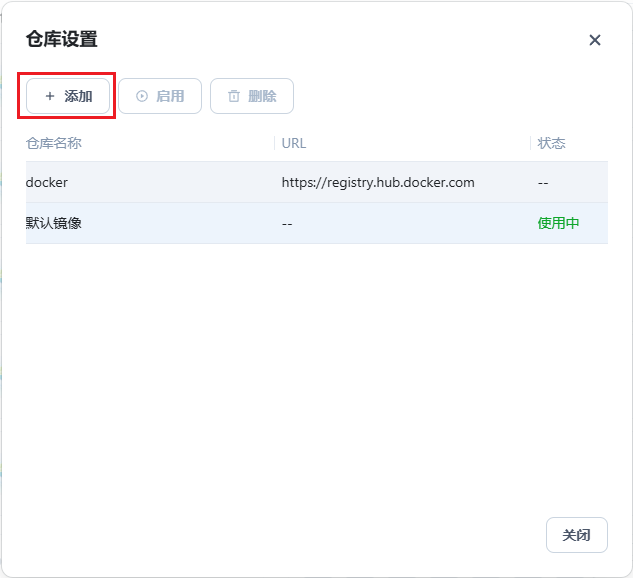
On the desktop, click docker, select Image Registry, and then click Registry Settings in the upper-right corner.
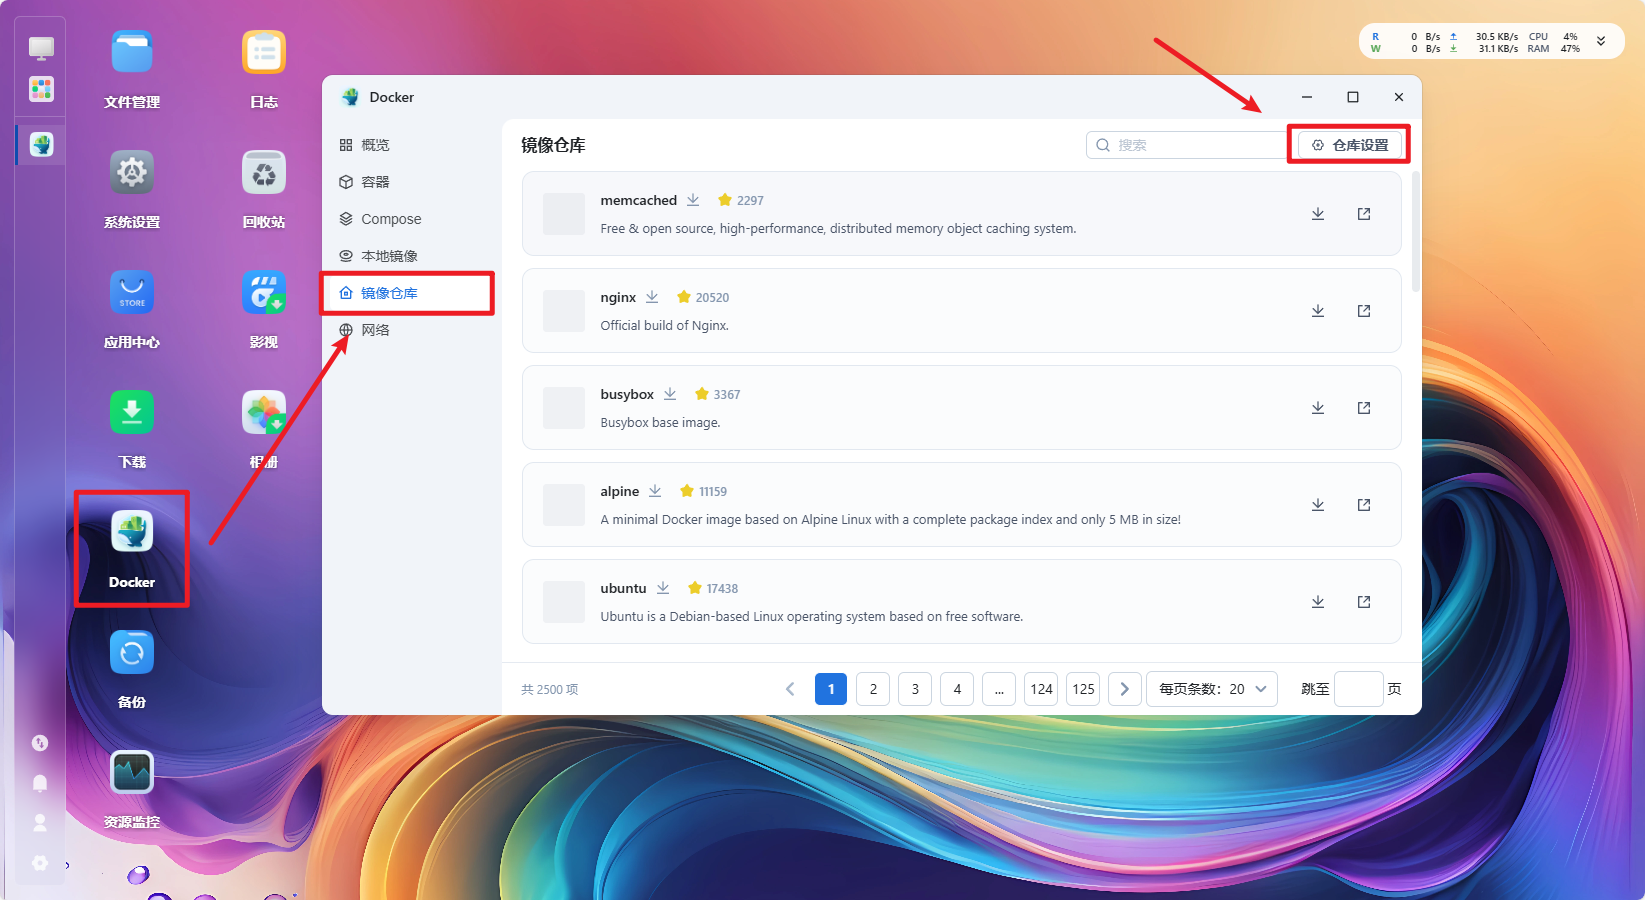
Click Add.
Enter a name and the mirror URL, then click confirm to save and click Enable to enable the mirror.
There are many available mirrors. You can search for one online. This example uses Xuanyuan Mirror.
https://docker.xuanyuan.me/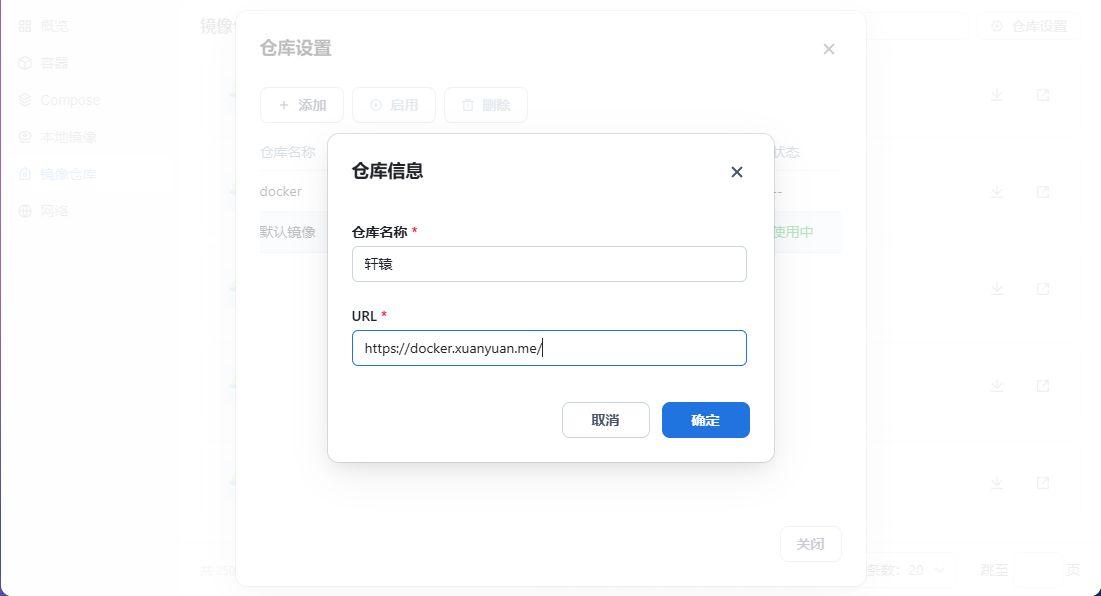
4.1.2 Create a Project
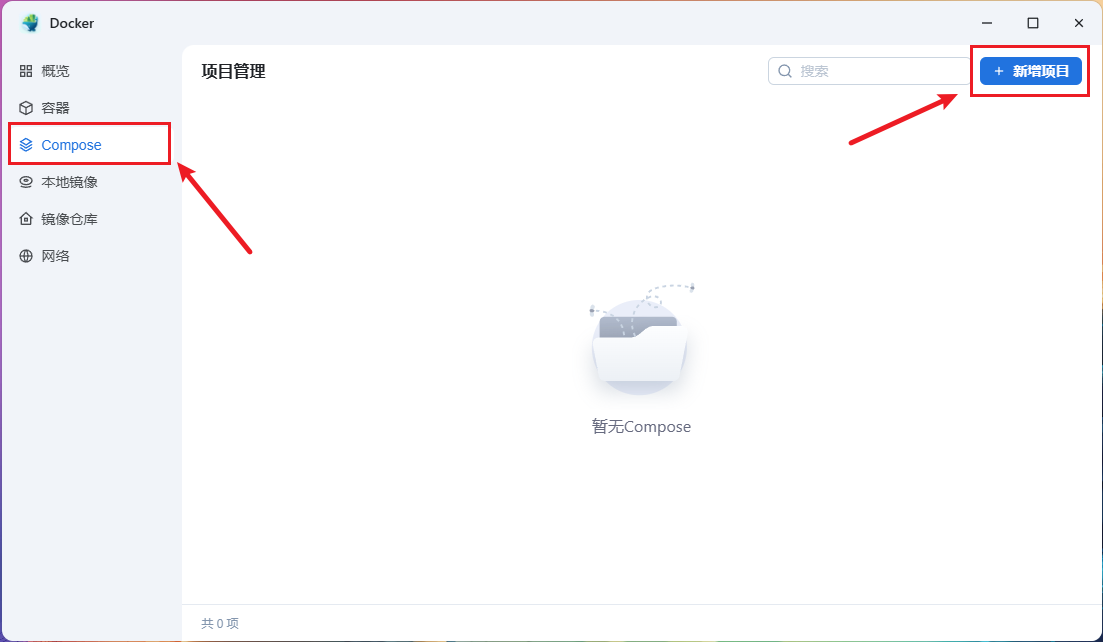
Click Compose in the left sidebar of Docker, then click New Project in the upper-right corner.
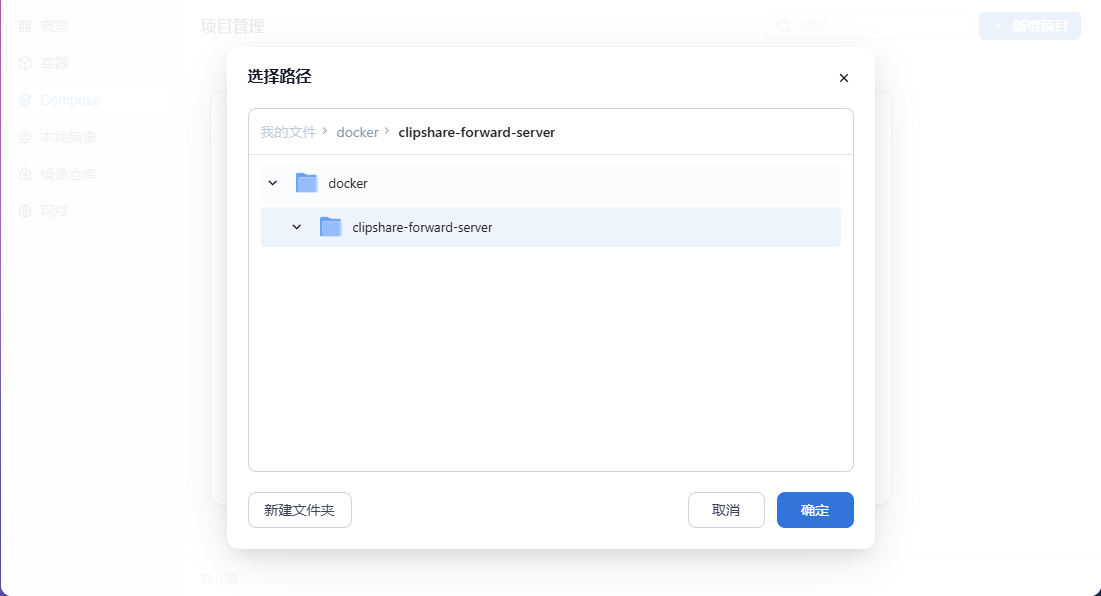
Create a folder to store the data generated by the container and select it.
Under Source, choose Create docker-compose.yml, then copy and paste the docker-compose configuration from section 1.2.2 of this document.
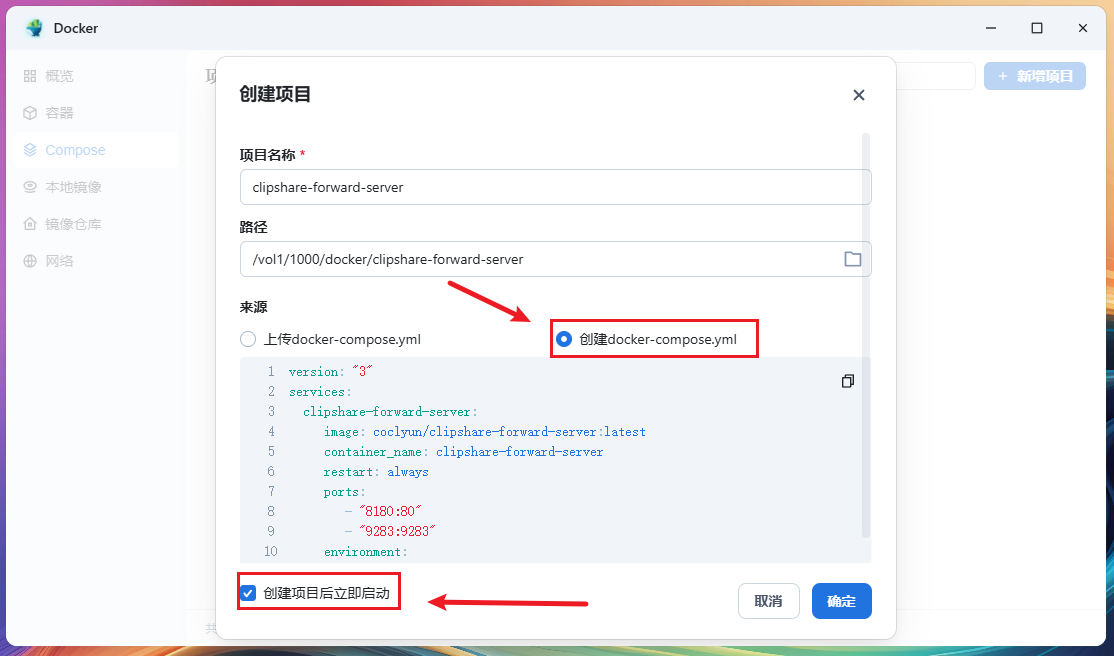
Check Start immediately after project creation, then click confirm to begin building.
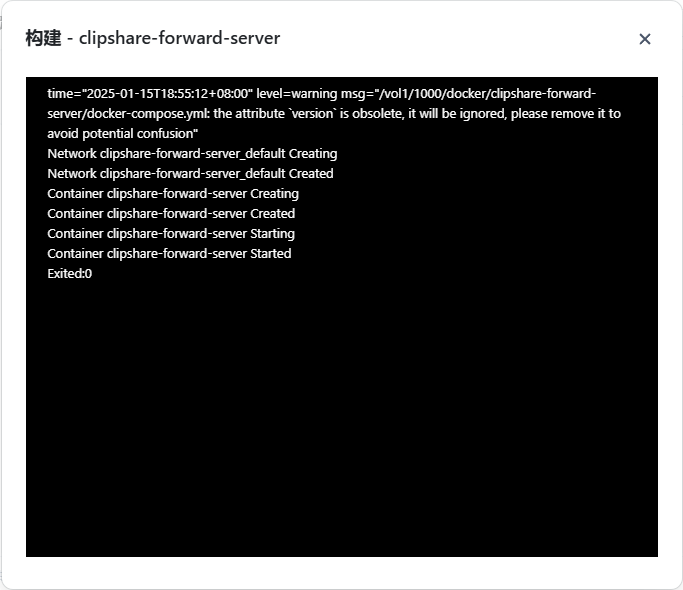
After the build finishes, visit ip:8180. The default username is admin, and the password is 1234567.
4.2 ClawCloud
Tip
If you have a Github account and it was registered more than 180 days ago, you can get a free $5/month credit from Claw Cloud. You can use it to build the relay service. The limits are 10 GB storage/month and 10 GB traffic/month.
4.2.1 Build
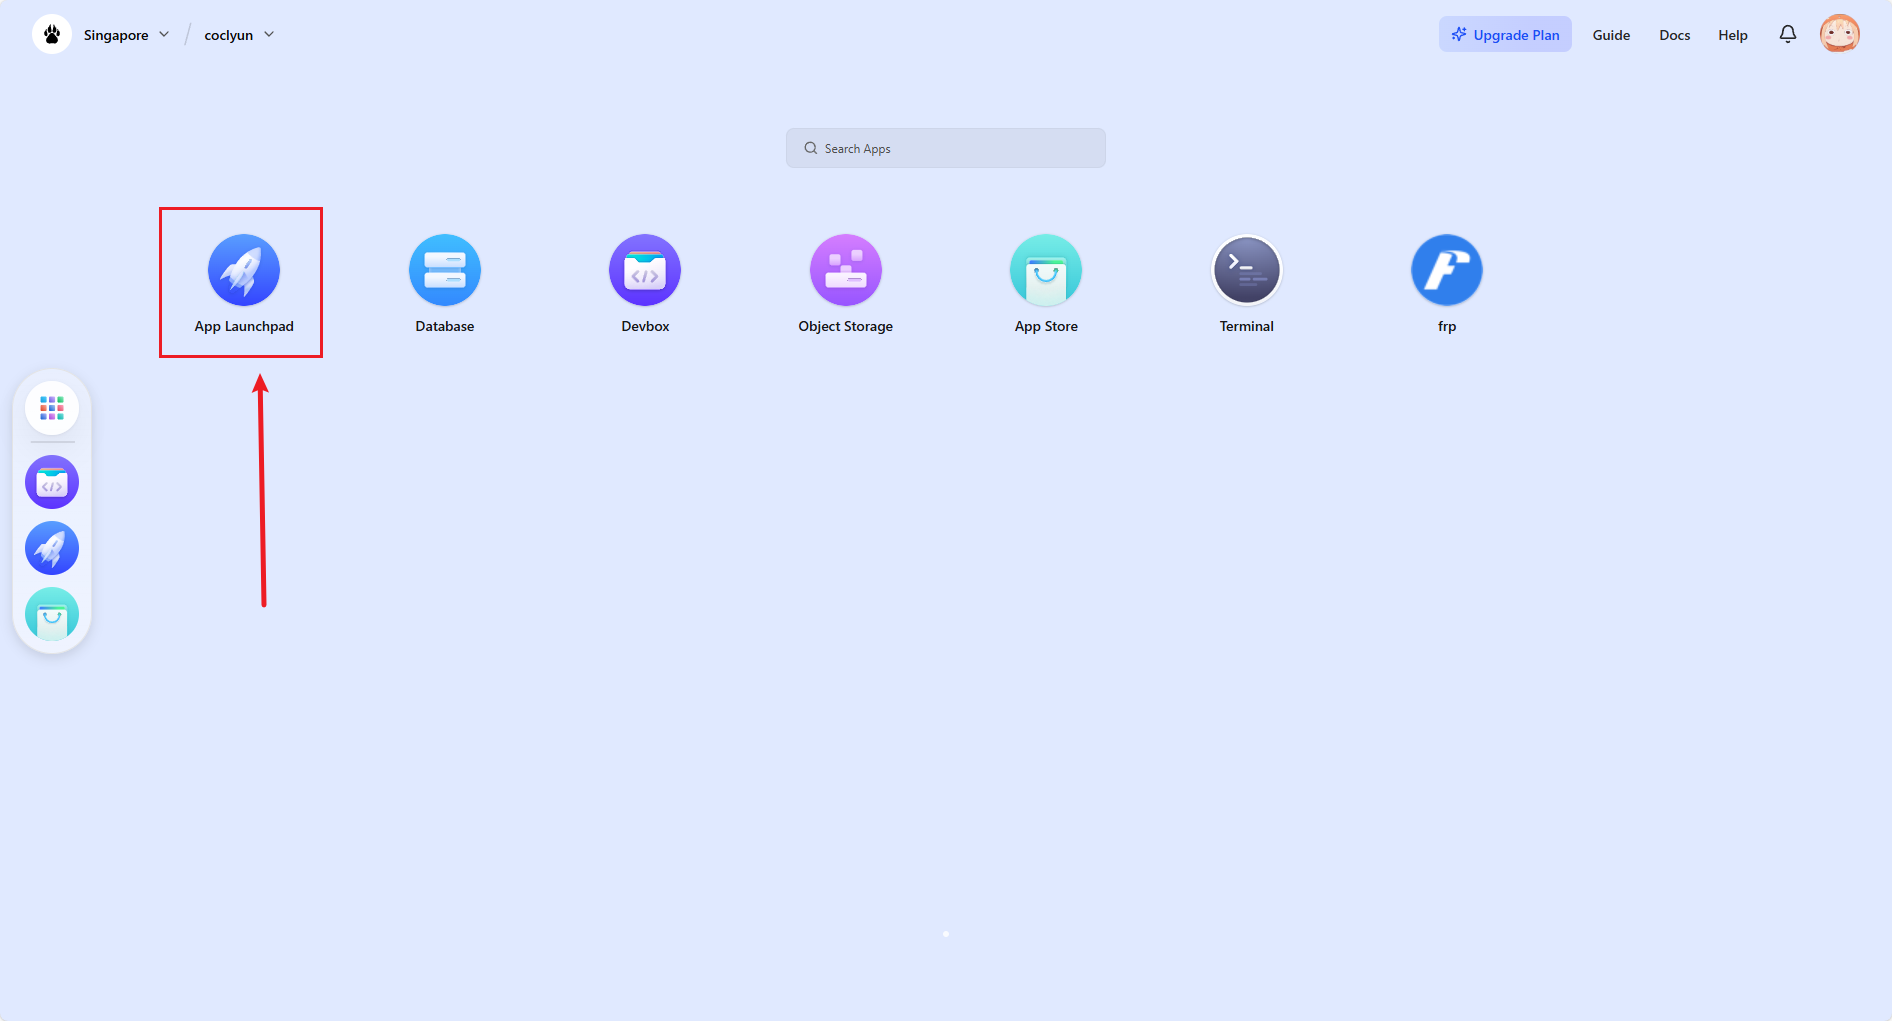
After registration, click App Launchpad.
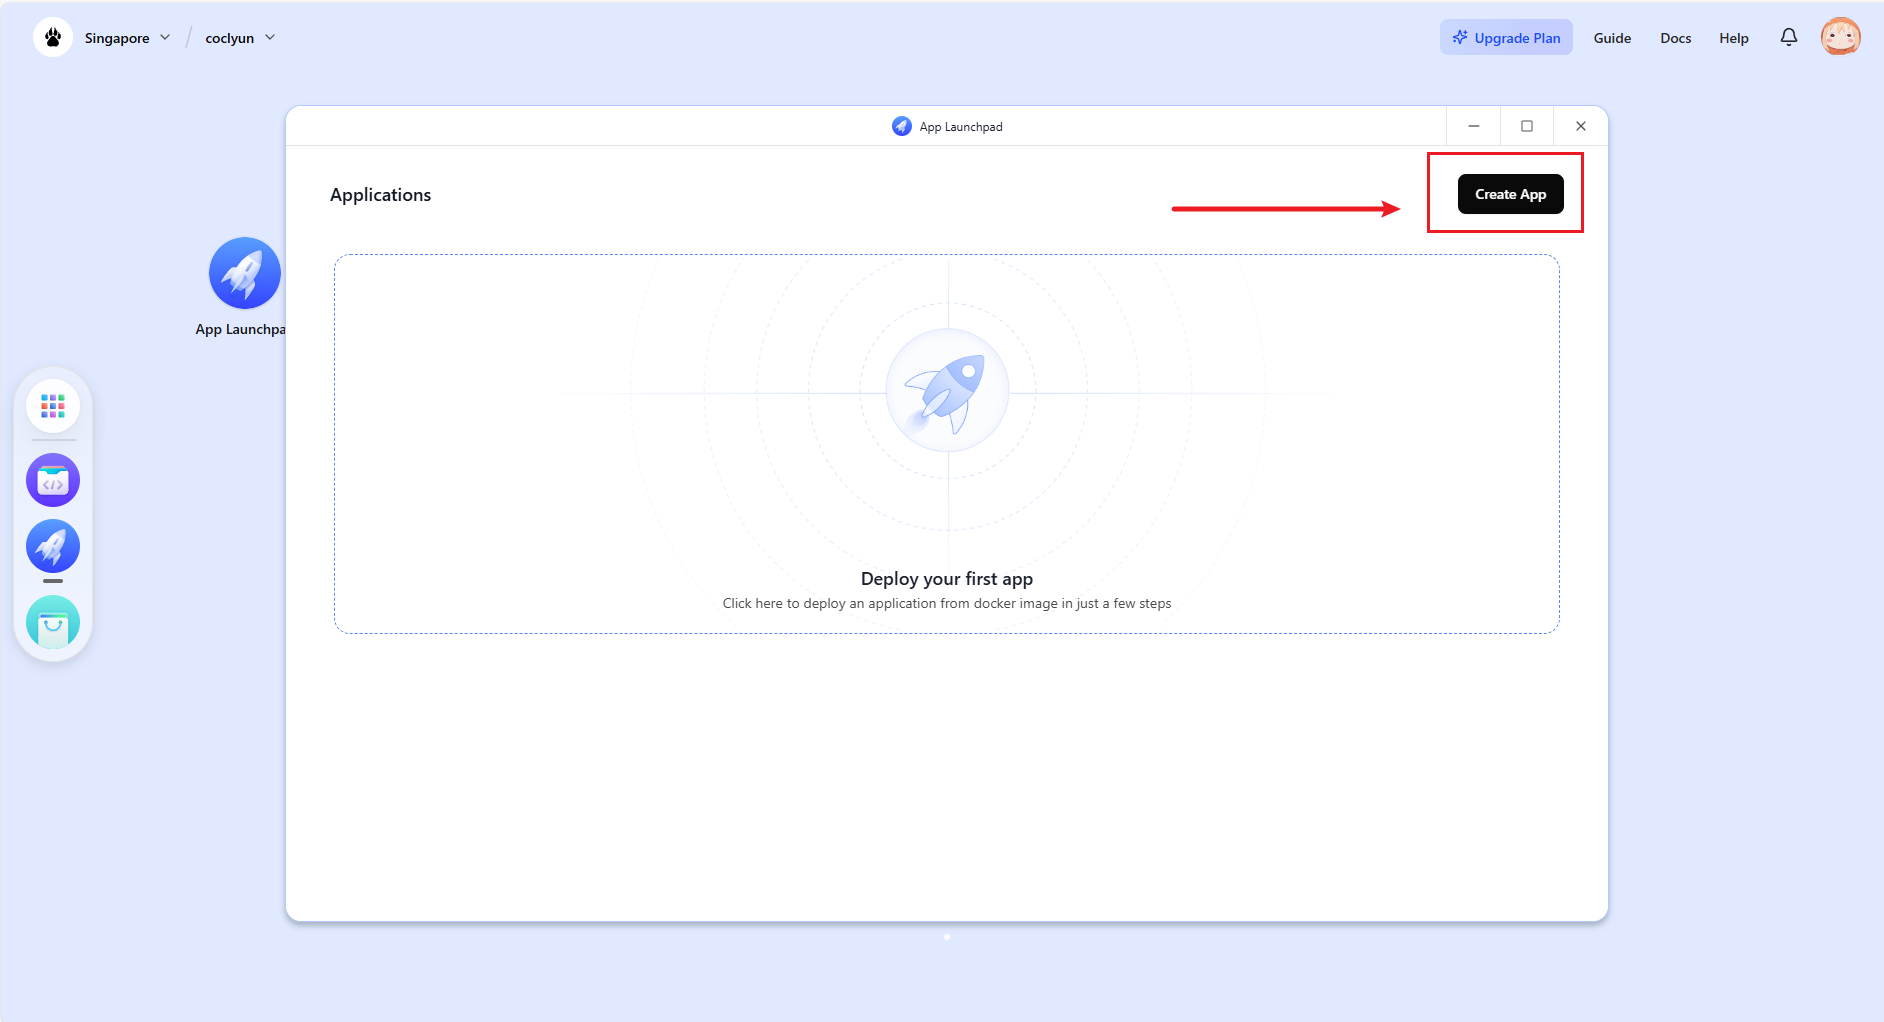
Click Create App.
Fill in the information as shown in the popup. The image should be coclyun/clipshare-forward-server. The Total on the left shows daily consumption.
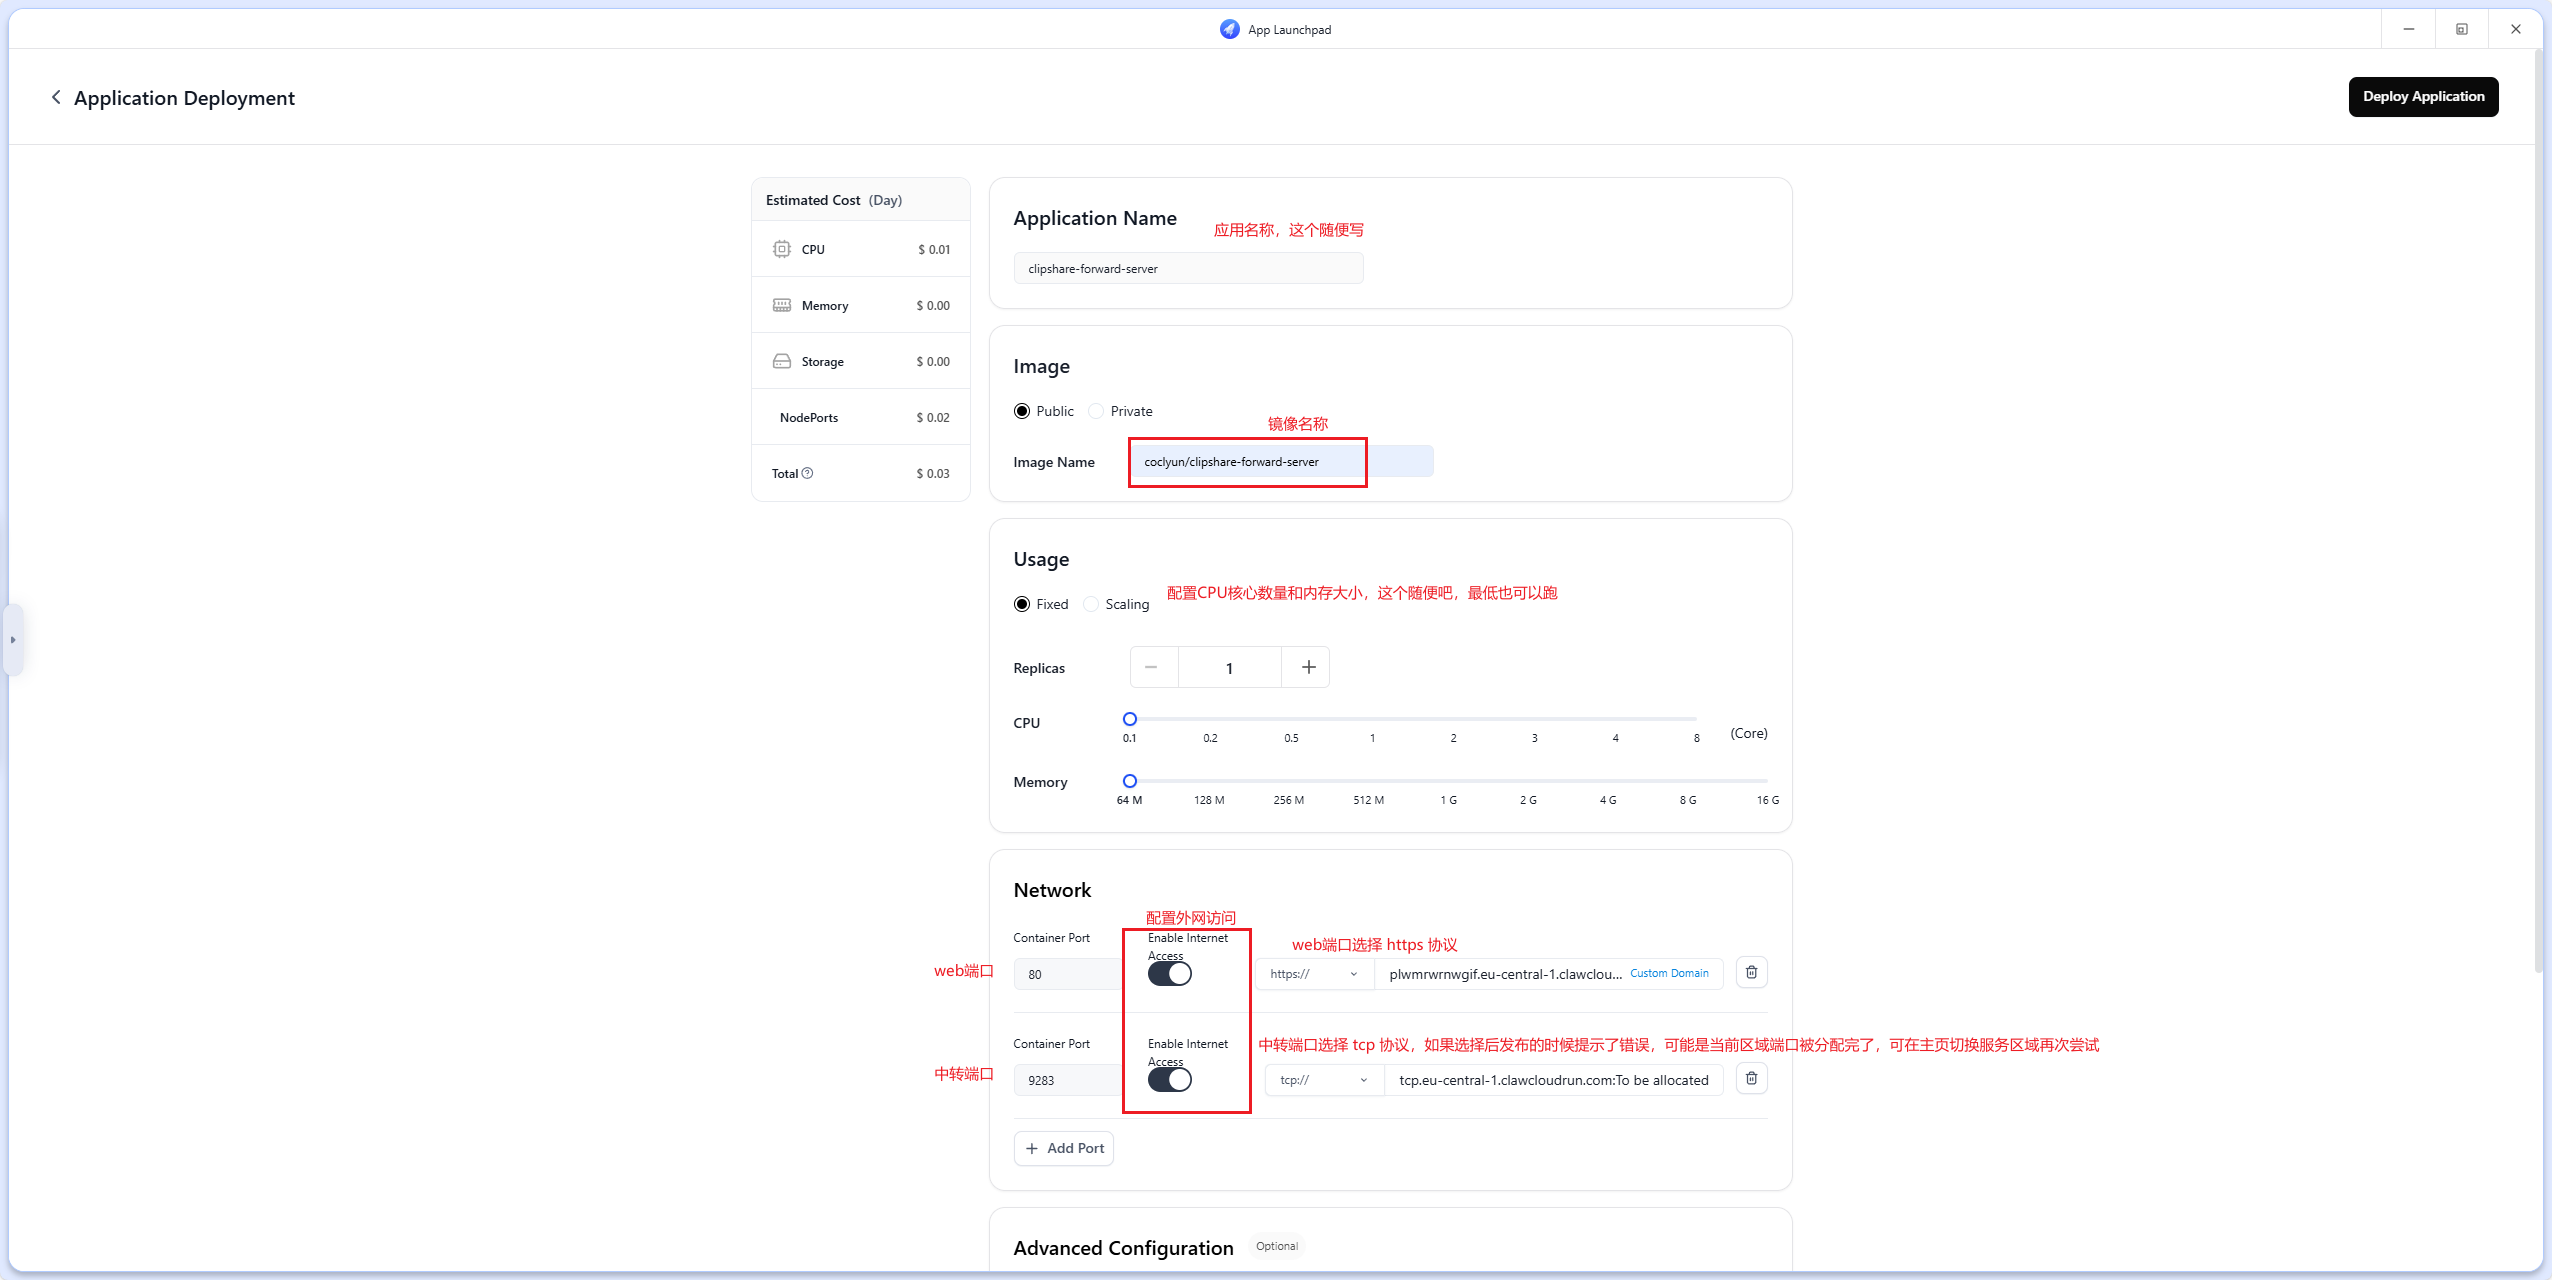
Scroll to the bottom, find the storage configuration, click add, and create a storage entry to persist configuration data. Otherwise, everything will be lost after a restart.

Click Deploy Application in the upper-right corner to publish the app.
Tip
If all information is filled in but deployment still reports Internal error occurred: failed to allocate a nodePort, it usually means the TCP port range in the current region has been exhausted. Try switching to another region from the upper-left corner of the home page and deploy again.
4.2.2 Test Access
On the application page, you can see the access addresses. The HTTPS address for the web port can be opened directly.

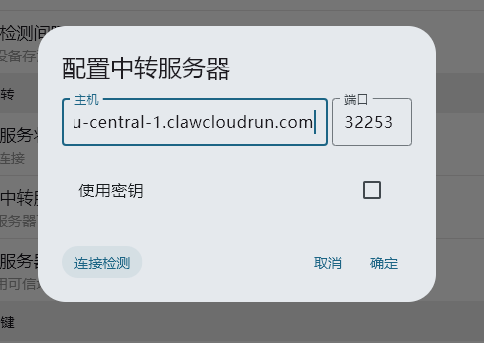
The TCP address is the relay address. Copy its domain name, without the tcp:// prefix, into ClipShare for testing.
Successful access:
